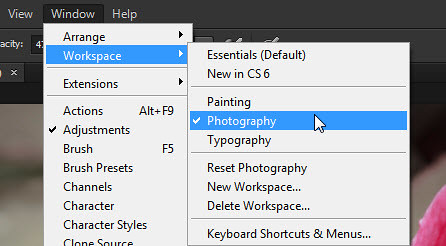
In this tutorial we will learn about how to set our workspace according to our need, how to set size of your canvas and other settings related to our document. Firstly we will learn about Workspace and how to arrange it You can understand Workspace by like your working environment, for instance you are doing painting, so you want tools and everything according to that only. Same like that Photoshop gives you some presets for workspace like Painting, Photography, and Typography. Every workspace is designed according to full fill your specific need. Choose workspace from window>workspace
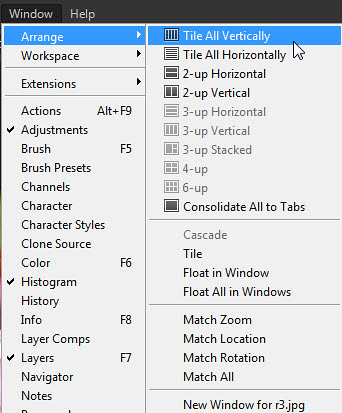
You can make your own workspace by arranging docks according to your need. And save your new dock by clicking on New Workspace. Arrange multiple canvases You can set multiple canvases according to your need. There are some presets which will help you to arrange your canvas. Go to window > arrange and choose one of your desired preset.
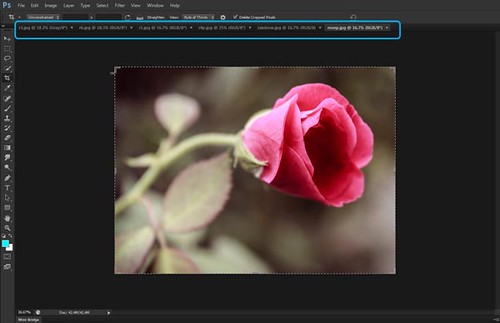
For instance normally you can see names of all canvases on a bar and can select them to see them. ( It is default but if you chose any other then select “Consolidate All to Tabs” to arrange all canvas like this)
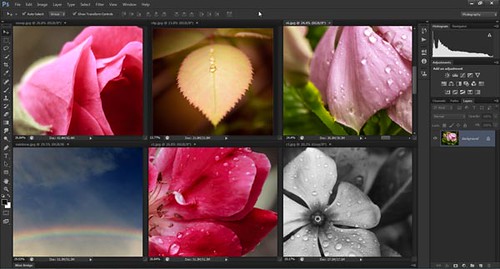
But if you want all of them set in a way that you can see all of them at a same time then you can choose any other option of arrange, here I will choose “6up”
So this is how you can arrange your multiple canvases according to need. Viewing Modes You have three viewing modes
Canvas and image size Canvas size and image size are two different things. If you increase or decrease the dimension of canvas it will only affect canvas not the size of image But if you change image size it means you are changing size of your image. How to change canvas or image size Firstly drag down the canvas tab and make floating canvas.
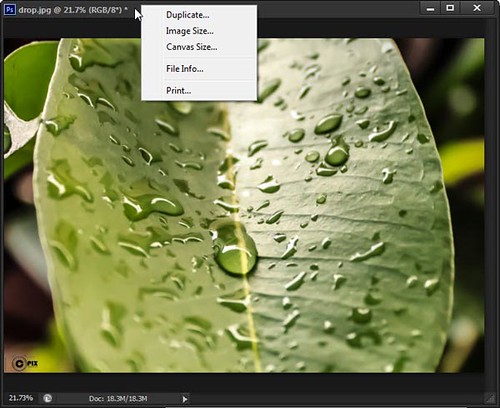
There you can see canvas size and image size, you can set your desired values for image or canvas size. Then , right click on tab of image window.
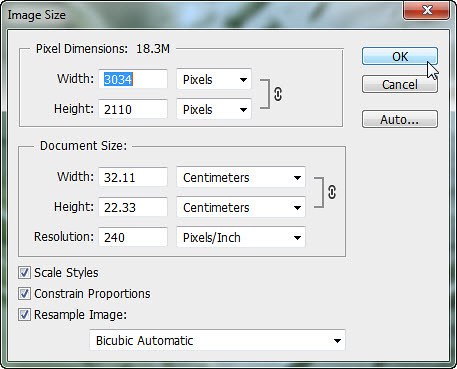
In image size window you can set pixel dimensions and it will automatically adjust document size which will be your desired output size. Shortcut for image size window is Alt+Ctrl+ I. Below in window you can see Scale style, if it is selected your effects also get resize in same proportion. Select Constraint Proportion to have changes in width and height in same proportion.
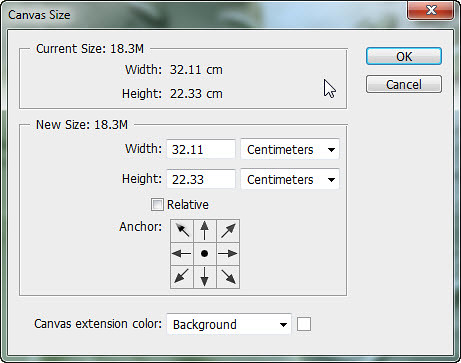
Now Canvas Size window. Shortcut is Alt+Ctrl+C. In this you can set dimensions for your canvas, which is your whole working area. On Top you can see current size and below you can give new size to you canvas.
Hopefully this tutorial helps you. Ask your Questions related to topic below in comments bar. Share Tool Tutorial with your friends through social and other medium ( would be appreciated! ![]()
TUTORIAL IN DEPTH :
In real life we have an area on which, we make drawing, painting, designs etc. Like paper or canvas, so just like that we have a virtual canvas in our Photoshop on which we make designs, painting and edit our photographs. And workspace is like an area of your working. Like you arrange your office according to your and type of your work. Just like that in Photoshop you can arrange everything according to your need. You can arrange floating docks, and activate or deactivate particular docks according to your type of work. Like in real world when I am writing something, I only have pencil , eraser and something related to writing only. But when I am making painting, I want colors, brush and other tools for painting.
Just like that we have to arrange workspace of Photoshop according to our work. Workspace Presets In Photoshop CS6 there are FIVE workspace presets.
You can find these presets in window menu > workspace or you can also find them in right of option bar.
Essential ( default ) – This is default Photoshop workspace, with some basic floating docks. You can say when you are in basic learning , this workspace is for you, after that no workspace is for you , because after learning basic almost everyone including me , create a new workspace for every project, just like my room, that no one can find anything at its place 😉
New in Cs6 – This preset is only to highlight new features of photoshop Cs6. When you select this one, all new features of Cs6 will be highlighted with blue color. If you are too much interested to see new features of Cs6 then you can try it. Now three useful workspace presets are painting, photography and typography.
Painting – As I mentioned above that for each type of work we want some different workspace, So this preset is for painting. It has everything for painting purpose, like brush dock, color swatches and all other docks useful for your virtual painting.
Photography – Same as painting preset we have photography workspace. It have docks related to photo editing and color correction of photographs. Like it have adjustment dock, by which you can directly add a adjustment layer ( adjustment layer is explained in Layer Chapter) and histogram dock is present in this workspace.
Typography – Typography is for written material. If you want to play with Letters, then this preset set everything according to your need. Character and paragraph panel added to give whole control over your text. Now if you mix all docks, and change their position, and you again want them same as they were before , then just reset that workspace. If you want your custom workspace then arrange all docks according to you and then select new workspace. You can also delete existing workspaces.
Canvas is a virtual area where you draw, paint or edit your photographs. Like in real you work on paper or canvas , here in photoshop canvas area or you can say working area is for you, on which you will explore your creation. Now sometimes you may work on multiple canvas. at that time there are many options to arrange them. By default you can see one canvas at a time. Tabs of all canvas will be appear in a row only. To go to any canvas just click on its tab and it will appear.
To switch between tabs press Ctrl + Tab For all shortcuts go to Photoshop Shortcuts
If you want a canvas out as a new window, then just drag it out from row, or right click on its tab and select move to new window. You can also see some more options on right click, like close, close all, new document and open document. These all options has been explained by me in How to get Start . This is just another way to take these actions. Now if you want to see all tabs in same time, like on screen you will see tiles of all canvas.
For this you can go to windows menu > arrange and there are many options by which you can arrange them in different ways. It is useful when you are working on a complex project on multiple canvas and want to see them at one place. Here we have some options in arranging canvas , tile all vertical, tile all horizontal, 2- up horizontal, 2-up vertical, 3-up horizontal, 3-up vertical, 3- up stacked, 4- up, 6 – up. Here I am showing you example of 6- up, in which all my 6 canvas are tiled in front of me. This help me in some complex projects and I mostly use it to compare my designs or photographs colors and tone in all canvas.
Here we have some more options in arrange, like if you have to arrange all canvas to default then select “consolidate all to tabs”. And there are some more options like match zoom, match location, match rotation and match all, by this you can match specific properties of all canvas , like location of canvas, their zoom, rotation or match all for all properties.
Viewing Modes
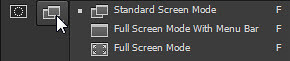
There are three different view modes Standard Screen Mode, Full Screen mode with menu bar and full screen mode. You will see their icon in bottom of toolbar and options are nested within one single icon. Last used viewing mode will be seen on toolbar. Press and hold on that icon to see all three icons.
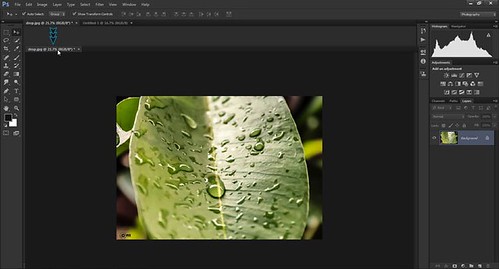
- Standard screen mode is by default, in which you see all floating docks, menu bar and footer. It is just like any other software which shows task bar of computer, Three buttons at right top corner close, maximize and minimize. So overall in this mode you will see a stand Photoshop.
- Full screen mode with menu bar is another Photoshop viewing mode, in which Photoshop goes to full screen mode but all menus , menu bar , floating docks still appear. Windows task bar and Close, minimize and maximize buttons gets disappear.
- Full Screen Mode is last viewing mode in Photoshop viewing mode, after standard I use this mode mostly. As this mode only shows the canvas are or you can say working area on which you did your creation. By this mode you can only see your creation without any menu or floating dock. Everything gets disappear and it only focus on your work. You can swap these modes by pressing ” F ” keyword, for more shortcuts go to Photoshop Shortcuts in this you can get all shortcuts at one place.
Canvas Size and image size
In last tutorials we learn that we set canvas size in start of new project only. At that time we specify our canvas size in new document window. But what to do if we have to change it afterwards during working of project. At that time we can change our canvas size by some ways. Firstly you can drag your canvas to make a floating canvas, right click on it and click on canvas size.
There only you can see image size. Difference between canvas and image size are , that canvas size effect the size of working area only , not the image or creation in it. Now image size effects the image or creation inside the canvas. For example if I change the image size and I have a photograph on canvas , the it effects the dimensions of that photograph. Now when you right click you see both image and canvas size.
Here you can see Canvas Size window, in which you can change Canvas Size. You can change its width and height, can select preferred unit to set canvas size. You can change background layer color from here only by canvas extension color.
Now you can see image size pallet , same like canvas size here you can set dimension and its units. You also set resolution of document, means dpi, dots per inch or pixel per inch (ppi). It has been explained in last tutorial. Check on constraint proportion if you want to change size in same proportion. Here are shortcuts for canvas size and image size. Canvas size – alt + ctrl + C Image size – alt + ctrl + I For more shortcuts go to Photoshop Shortcuts in this you can get all shortcuts at one place. You can also see canvas size and image size options in Image menu.
How to duplicate canvas?
Sometime we need to duplicate a document or canvas, so that we can have some experiment on that canvas rather than our main document. So when we right click for image size and canvas size there is also option for Duplicate. By this your document have a duplicate copy of it. You can also get this option in image menu .
Hopefully this tutorial helps you to have next step on your creative journey of Photoshop with tooltutorial.com
By this tutorial you are now familiar with your workspace and canvas on which you have to create wonders. If you have any questions, You can surely comment them down, and we’ll be there to reply!


