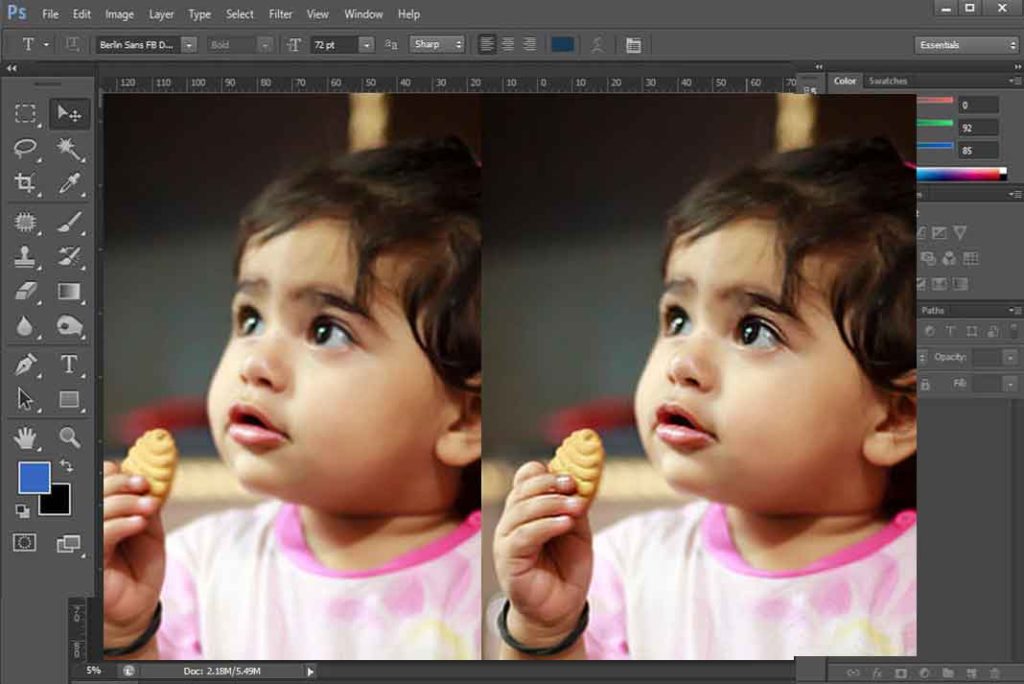
This is advance eraser tool used in editing. It share single cell in toolbar with eraser tool and magic eraser tool. Background eraser tool is used to remove background with just one click and drag.

Let see how it works :
When you select this tool your cursor changes to a circle and a plus sign inside it. Now you just want to click on your background and start dragging where you want to erase background. But Photoshop doesn’t know what is background for us so wherever that plus mark goes, that color will come in its radar.

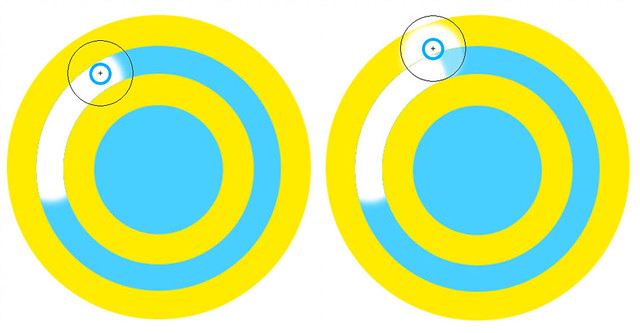
Now firstly see a quick basic example to understand its working.

In above image you can see when cross mark was on blue area, it was only erasing that color but when I move brush and take it on yellow color, then it samples that color as background color. It was an overview of this tool, now let us come to its options and have some real world examples.
Sampling
Here we have three types of sampling on our option bar:

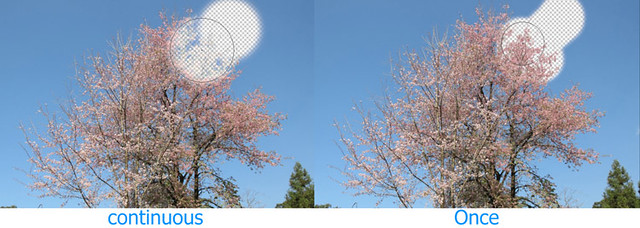
In below image I tried to explain difference between continuous and once sampling.

Photoshop doesn’t know what is tree or sky, for us sky is our background but Photoshop understand it by color sampling. So when we select continuous it is taking sample again and again wherever you drag the tool, in that case when my pointer goes on tree color at that time it reads it as background, as result it start erasing tree also.
But when I select once it just take sample one time, as a result it only erase color range what it reads first time and that is of sky (blue color), so now we have our tree as it is.
(Note- that checker box pattern means transparent learn more about it in Layer Basic tutorial)
And when you select background swatch, you just want to pick background color from your desired background ,it will only read that color range as sample. But it is not that much useful.
Contiguous and Discontiguous is explained in Quick Selection tutorial.
Tolerance means range of sample color, more tolerance increase the range of sample color.
Protect Foreground is to prevent foreground erasing, keep it checked only.
Hopefully this tutorial helps you. Ask your Questions related to topic below in comments bar.
Share Tool Tutorial with your friends through social and other medium, would be appreciated!


Actually I want to know more about “background swatch”. I’m little bit in ambiguous about what is different between Once and Background Swatch?
Thanks for you kind information.
Hi Bijutoha
In once it will track background color once where you click first, and in background swatch, color which will be deleted is in background swatch. You can also refer to the video for practical example.
Be updated with tooltutorial.com and we regret for late reply due to technical issues.
Your 3.48 minutes video help me to clarify lot of my unknown issues. it’s helpful for the novice designer. Thanks for sharing the great resource.
Nice background removal tips.thanks for sharing.