In this tutorial we will learn working of Photoshop layers. As in chapter introduction we explained little about these layers. Because of these layers Photoshop became much more than a editing software. Layers make it easy to make graphics easily with all control over each step of making of the graphic.
As our painting has many steps , we have many coats of paint in a painting, we complete a painting in some steps, like have initial coat of background color, then a rough drawing, single coat of a paint then finishing of painting, but in real world we can’t change any of these steps in between or after painting has been done.
And here in virtual painting or graphic designing layers come to its role, by layers you can work on different layers for each step and can edit them anytime individually.
Let see working of Photoshop Layers
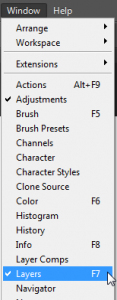
You can activate layer panel from Window > Layers or shortcut key for layer is F7. ( For full Photoshop shortcut keys collection go to Photoshop Shortcuts.)
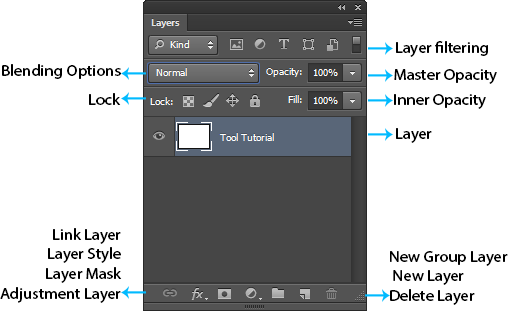
Layer panel includes all options to control layers, it is just like a compact box with all options. Each option has its own importance. Understand it properly you have to be familiar with Layer system of Photoshop, to create your graphics or edit photos easily.
Layer Panel contains all options for controlling layers with a ease.
Blending options, Layer filtering, Blending Options, Master opacity, Inner Opacity(fill), Lock, Layer, Link Layer, Layer Style, layer Mask, Adjustment Layer, New Group layer, New Layer, Delete Layer.
Each option has its switch, button or roll out menu.
Like any other floating dock, layer panel can also be resized or arranged anywhere according to you.
Floating Docks has been explained in previous chapters.
Firstly let us see how to make a New Layer
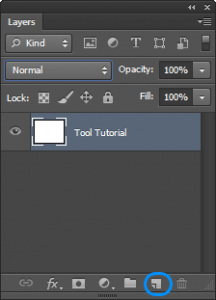
You can click on new layer icon present in bottom of layer panel. Shortcut for new layer Ctrl+Shift+N
Background Layer
When you open a new document at that time background layer will be locked and you can not make changes or create anything on it. So if you want to unlock background layer Just Double Click on it and it will be unlocked.In previous tutorials i had been explained that you can adjust background color at the time of new document only. So that background color is only fill color of this background layer.
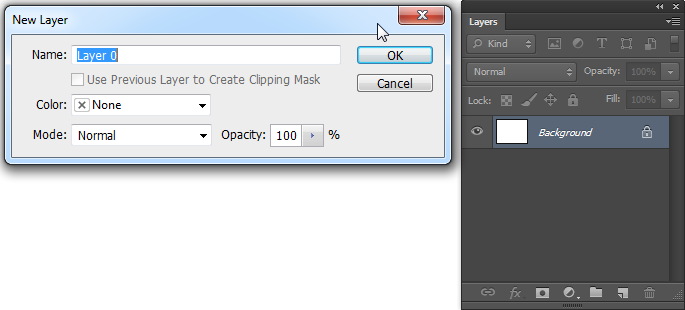
You can see a popup window to make background layer a new layer and you can change its name through that window only.
or
Just Double click on layer to Rename Layer.
Arranging Layers
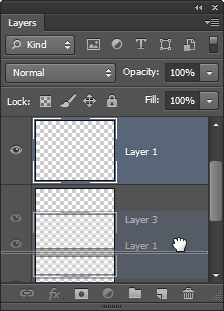
Your objects in project will appear according to the position of your layers. Object on upper layer will be on top of its bottom layer’s objects. You can bring layer up or down, can change its position at any time. By this you have all flexibility to arrange your objects according to you. To see this practically , watch video of this tutorial which is placed in the starting of page. To bring a layer up or down just hold it and drag it upward or downward and place it at desired position.
Layer eye
It is an important switch in layer panel, you can see it in front of every layer. By this you can make your layers visible or invisible. Just click on eye to make visible or invisible the layer.
This eye icon will also appear on effects applied to layer, so that by this you can make desired effect invisible. It helps in several complex projects. While making digital painting, with tracing technique I usually use it frequently to see my reference. It is just one case but this eye icon helps you in every complex project.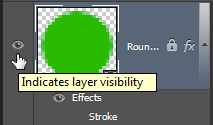
Transparent layer
A new layer will be always transparent and you start with your creation on it. If you have no background layer and you make a new layer then work area will look like this. Its like a transparent sheet on which you can draw anything and can have anybackground under it.
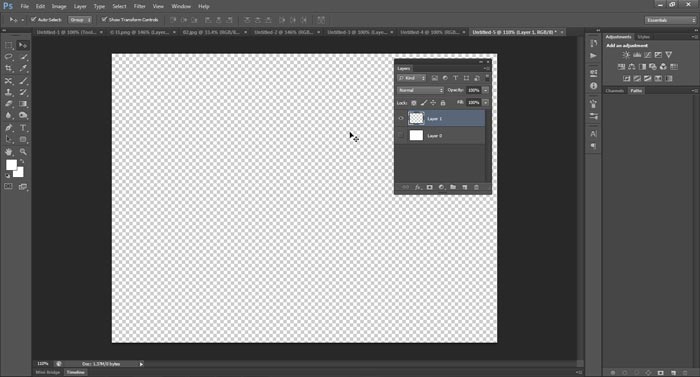
This box texture means TRANSPARENT. It will be used to make PNG images (to know about formats go to Photoshop Formats) usually PNG images have transparent background.
Delete Layer
If you want to delete a layer just select that layer click on Delete button or drag your layer on delete icon.

Duplicate layer
Select layer and click on Duplicate layer from layer menu Or just drag the layer on new layer icon in layer panel.
One more option is select layer and press alt key + any arrow key. You can also just right click on that layer and can select duplicate layer.
Create layer Group
In complex projects you have to define groups, as it make easy to arrange number of layers.
Just like you have many books of different topics in your bookshelf, and just like my book shelf all books are here and there arranged randomly. At that time you have to search with a magnificent glass for your books. But if you arrange them according to topic you can get them easily and pick any of them quickly.
Now like this only we have to arrange layers in layer palette according to related layers. So that you can select any layer easily.
You can also select whole group at one time also.
While you select Move Tool (explained in selection chapter) , you can see it in option bar , select Layer or Group.
If you select group , by this you can select all objects in a group by one click only.
To make a new group just select your desired layers and click on create a new group button or drag selected layers on that icon.
You can also create group by selecting layers ( press shift and select layers which you want) and go to layer menu > New and then select group.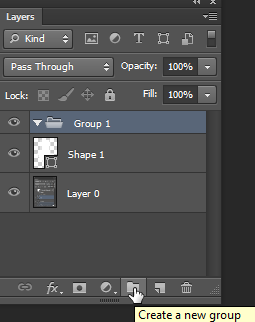
Link Layers
It is like tying a rope between two layers. Linked layer will move with each other.
To link layers just select layers which you want to link and click on Link layer icon or drag your layers on it. A link mark will be shown on all linked layers when you select one of them.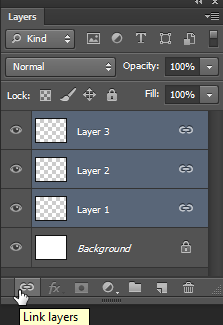
Layer Thumbnail
You can see a layer thumbnail on every layer in which you can see content of that layer.
To change layer thumbnail setting Right Click on thumbnail and you get options to change its sizes.
There is also a layer mask thumbnail, it will be explained in masking tutorial.
But don’t get confused in layer or layer mask thumbnail as while working with layer masking you have to see which thumbnail you are selecting. Selecting layer thumbnail and then working on canvas effect layer only, and selecting layer mask thumbnail will effect mask property.
Rasterize Layer
We learn about rasterize in Introduction session, now we will see what rasterize layer is, and how we can make it. So Firstly rasterize layer is a layer in which you can edit images, you can use painting tool, filters and effects. But you can’t use these in vector layer like text and shape layers.
Now how to make layer a rasterize layer. Just right click on layer and Click on rasterize layer, when you are rasterizing a text layer then on right click you will see rasterize text, same in shape layer.
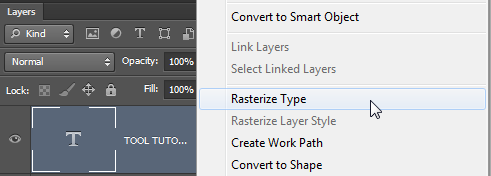
If you try to apply any effect or editing tool on vector layer a popup will be appear to make your layer a rasterize layer.
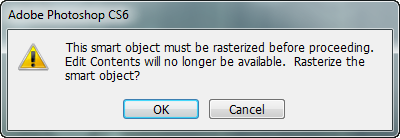
Opacity And Fill Options
On top of the layer panel you can see opacity and fill options.
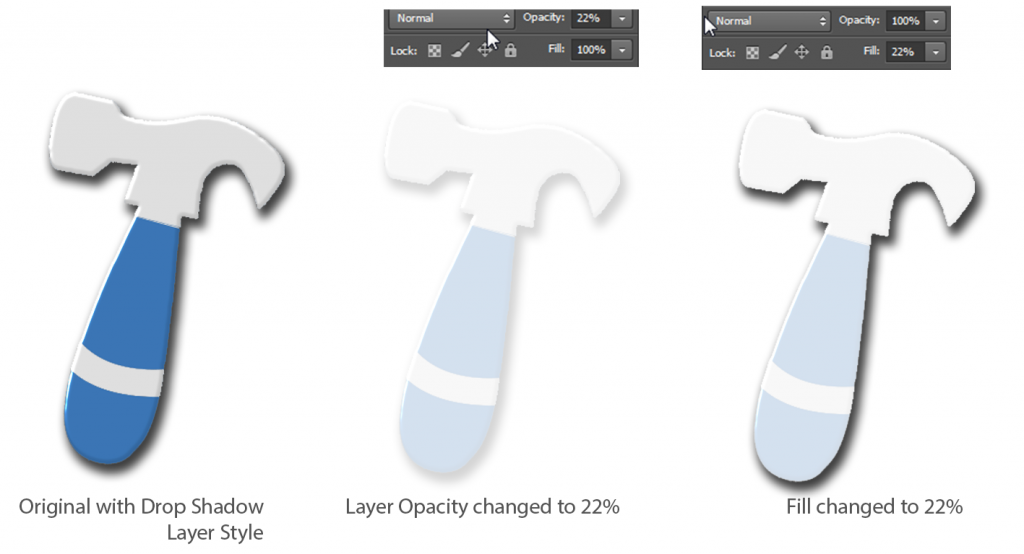
Now these are similar options for different uses. Both are fore controlling transparency of layer or you can say objects in your layer.
In opacity you set the transparency level of whole object including layer style ( we will explain Layer style in different tutorial).In Fill you can only control the opacity of its inner part means if you give stroke or outline to the object then fill will not change its opacity.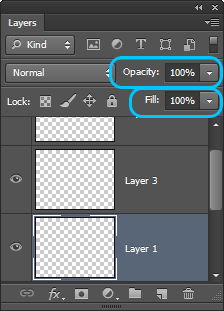
By this image you can understand difference between Opacity and Fill.
Lock Layers
There are four types of lock options to control your layers. These locks are useful in complex projects. A Layer with lock active has a lock mark on it.
Locking layer is just like putting restriction on someone. Like in school sometimes we are restricted to go in play ground, going out from class, chit chat, games etc. at that time we feel we are locked from all sides, but when we are restricted for only one thing, at that time we can do all activities other than that one restricted activity. Just like that we have four locks, one is to lock layer totally and other are for lock their one specific action.


Firstly see Lock All![]() By this you can lock all properties of layer, layer cannot be moved, you cannot put any effect or use any tool on locked layer
By this you can lock all properties of layer, layer cannot be moved, you cannot put any effect or use any tool on locked layer
Lock Position![]() It will only lock position of layer, means you can’t move your objects present in that layer.
It will only lock position of layer, means you can’t move your objects present in that layer.
Pixel Lock (only for rasterize layers)![]() By this lock you can lock pixels means you can’t edit color or shape of object present in that layer. Therefore if pixel lock is active on any layer, then you can’t use painting our retouching tools on it.
By this lock you can lock pixels means you can’t edit color or shape of object present in that layer. Therefore if pixel lock is active on any layer, then you can’t use painting our retouching tools on it.
Transparent Pixel Lock (only for rasterize layers)
It will lock transparent area of layer means if it is active, then you can’t work on transparent area of that layer.
Let us explain this with an example : Here is a text with transparent background and I make this layer rasterize as this lock will only work if layer is rasterized. Now if I apply paint brush on this layer it will work like this, it spread all over the layer where we use brush. But I want that brush affect only where pixels are present not in transparent area.
 So I active Transparent Pixel Lock on this layer

After that when I run brush on that layer it ignore the transparent area and run only where pixels are present.

Color of layer
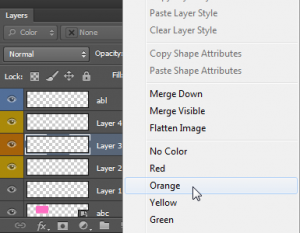
It is like a marker. This is again option for complex projects where you can mark your layer with one of the given colors and can remind for which purpose that layer was marked, or you can mark layers to make categories.
You can give a specific color to layer by a right click on layer and choose a color from specific list.
Filtering Layers
Sometime in complex project you want that only one type of layers get visible, like you only want to see Text layers or you want layers only with some specific layer style. On the top of the panel you can select the category to see only that type of layer.
On left you can see categories with a search icon and with that you have options according to selected category and on right corner you can see switch its fir to make filtering on and off.
Now here we see basic working of layers, in coming tutorials we will learn about:
Layer Styles Blending Options Adjustment Layers Smart Object
You can also watch video of this tutorial. It will give you idea of practical working, Videos are available for only some important tutorials. If you want video of specific tutorial on tooltutorial.com, mail us at contact@tooltutorial.com
Our team is always ready to complete all your requirements related to this course.


I really happy see your presentation. It is too helpful for beginner. Hope you will take each of the tool from PS.
Thanks again.
Thanks 🙂 be updated with tooltutorial.com
Really awesome tutorial with the estimate !!
Nicely explained about Photoshop layers. You have explained step by step to make it easier to the learner. Thanks for sharing your knowledge to make someone enlighten.