In this tutorial we will learn about adjusting colors of our images and how to balance colors. We have many aspects of colors in a photo and Photoshop provide us all controls to adjust colors of our image.
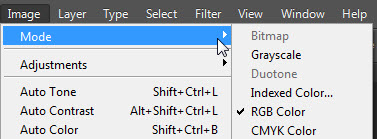
Before starting this tutorial have a look on Colors tutorials so that you get familiar with the terms used in this tutorial. Now let us start with modes, Select mode from Image menu.
- RGB if output is for web media.
- CMYK if output is for Print media.
- Grayscale if output is black and white.
Tip- Before doing any adjustment it would be preferable to create an adjustment layer (Go to Adjustment layer Tutorial for more info about it)
Now let us come to adjustments
Auto Adjustments
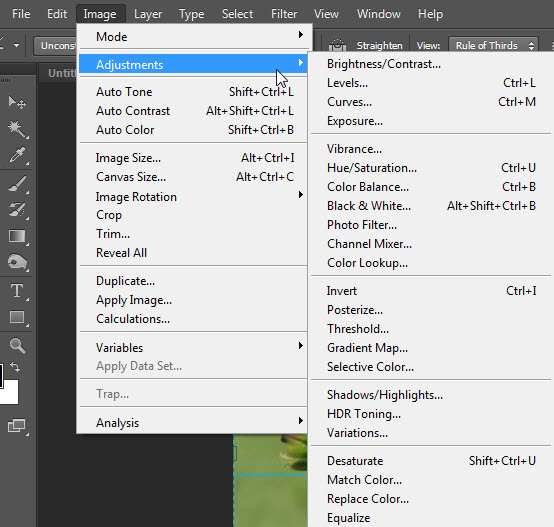
In image menu you can see three auto adjustments.
- Auto Tone – It set tonal range of image automatically.
- Auto Contrast – By this you can adjust contrast with just one click.
- Auto Color – It balances the colors of image by seeing darkest and lightest points in image.
By these you let Photoshop to adjust everything for you. But it is not necessary that it always give you desired results. You have no scope of personalization or creativity with these options. So after auto come to real adjustments, in these you have lot of controls to adjust many parameters of your image.
You will get all these adjustment in Image Menu.
Brightness and Contrast
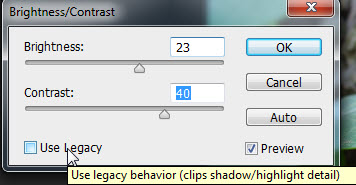
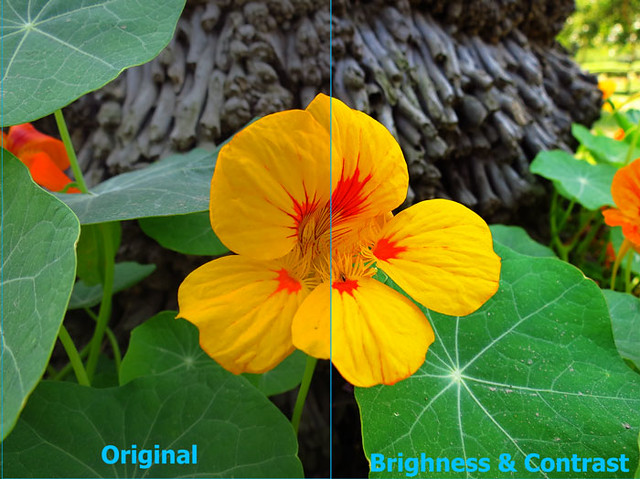
I don’t want to make it complex, by this you can adjust brightness and contrast of your image. It makes your photos alive, give depth in colors of image. Just move slider to adjust the values. Here I adjust one of my own captures, have a look on it and you will understand how to use brightness and contrast.
Levels
It is another adjustment tool and one of my favorite for adjusting contrast and brightness of my photos. Shortcut Key to open its window is Ctrl + , Firstly see how it works :
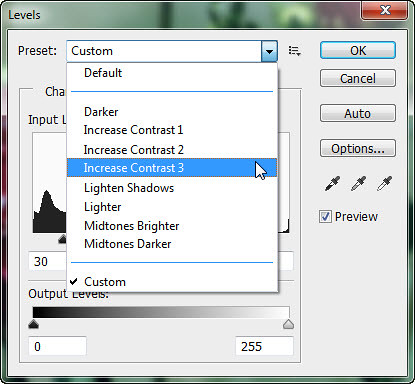
Here we have some presets by which you can adjust level with an ease and it will you near to you desired point, after that you can adjust from sliders given below.
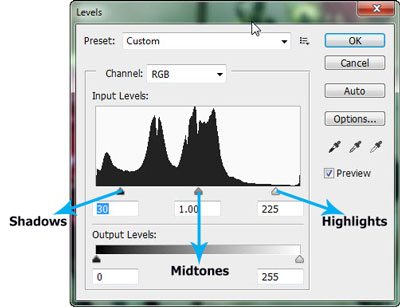
By these sliders you can individually set darker areas, midtones and highlights. Slide these sliders to adjust the values.
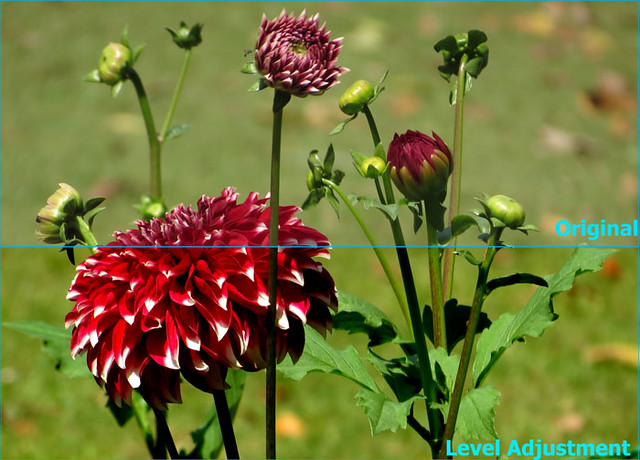
Here is an example to explain you its effect.
Curves
It is another way to set contrast and color correction of our photos. But it gives you more flexibility to work with shadows, midtones and highlights. Let us see how it works:

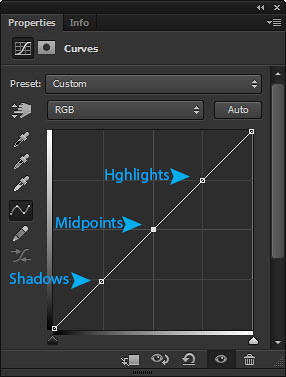
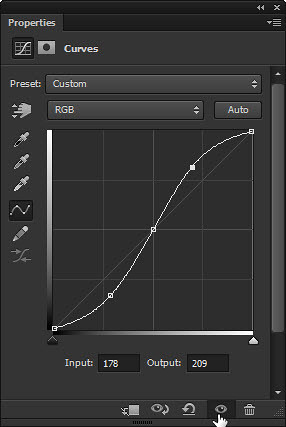
Here we have curves window, in which you will adjust the curve by adding points on this diagonal line, these points will adjust shadows, midpoints and highlights. Just click on that line and add points, in below image I define these three points on my curve line.
Now most famous type of curve is “S” curve to have better contrast and depth in image.
Just move these points to make it S shaped curve,
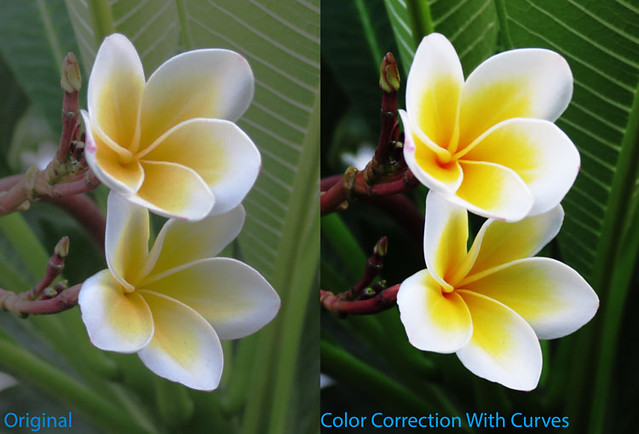
Here we have two pics one is original and another with S curve, now you can see difference by your own. You can also choose some predefined curves from preset or simply press auto for automatic settings.
Hue and Saturation
By this adjustment we can change hue and saturation of an image. To learn about nature of colors go to Colors tutorial.
Hue is the colors that we see in rainbow. Rainbow colors include violet, indigo, blue, green, yellow, orange, and red. Collectively they are known as VIBGYOR. Intensity of color is called as saturation. It shows how much grayness a particular color contains.
Less saturated colors are dull, soft or you can say muted color. On other side High saturated colors are bright and intense. All hues are at 100 % saturation. Now how we adjust this in Photoshop.
Select Hue and Saturation from Image menu or use it as adjustment layer.
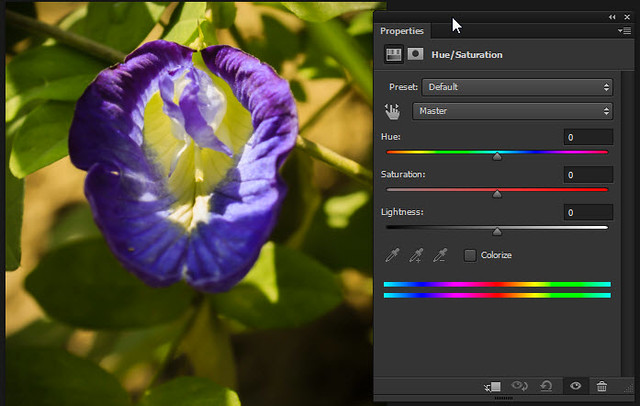
This is window of hue and saturation. Here you can see Hue, saturation and Lightness sliders.
By these you can control all these parameters.
You can give sepia or some color effects; there are also some predefined presets, after that everything depends on your need.
Here I move its Hue and Saturation sliders and you can see the effect of it.

Now come to more complex mode, till now we are working on Master mode that controls each channel of image, but you can also choose any one channel to be edited.
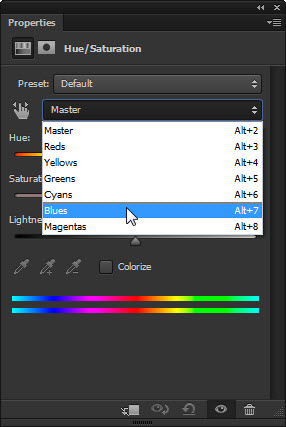
Here I choose Blues and now it will only effect blue color range in image, let’s see how?
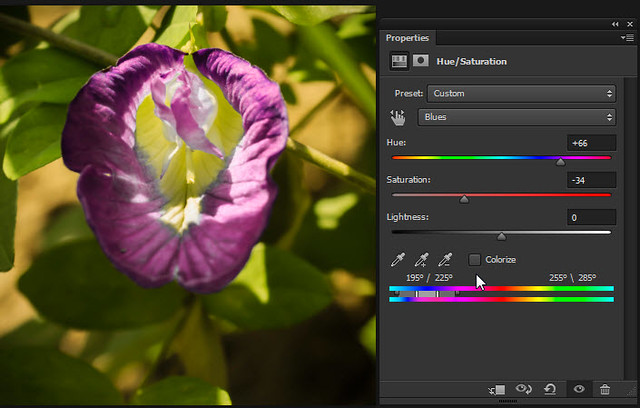
Now our blue flower turns into pinkish shade. So this is how you have lots of possibilities to affect hue and saturation of you image.
Colorize
In simple words this option is related to sepia effect. It’s like converting image into a single color tone.
Let us see how to use it.
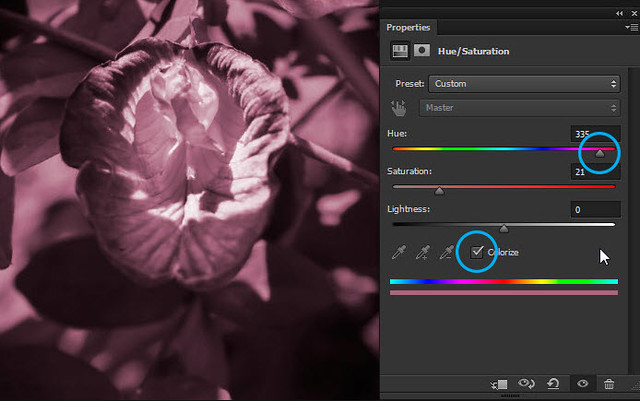
Here I click on colorize and change Hue color and Its Saturation, after that I got a single tone image you can choose any color from hue slider.
Black and white
Old Is Gold, these are evergreen words. In today’s colorful media also we still have craze about black and white, sepia, and other single tone effects. So for all these we have black and white adjustment.
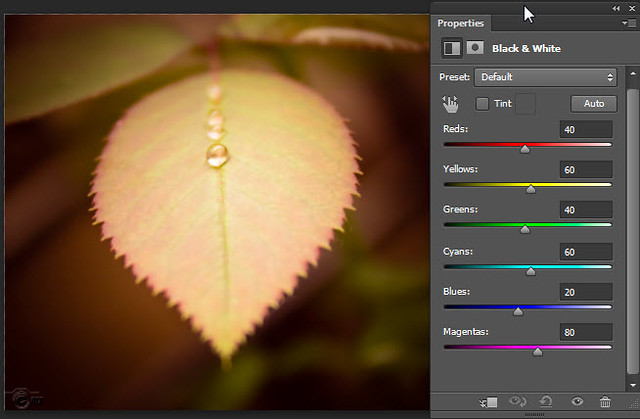
Here you can see image which will be turn into black and white and on right you can see pallet of black and white properties.
Now here is result when I apply black and white on this image.
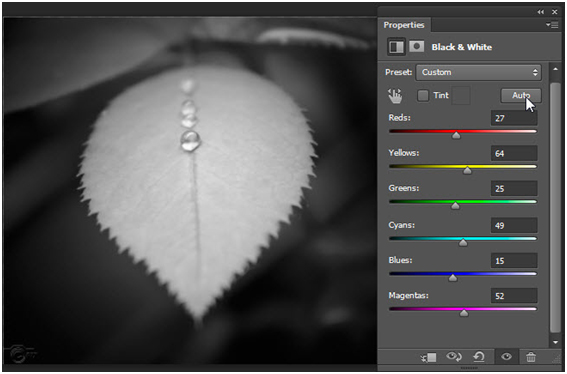
In Black and white panel you have presets from there you can choose presets but if you want something extra according to you, then below you have six color channels in which you can adjust their Black and White Values individually.
Let us see how these slider works.
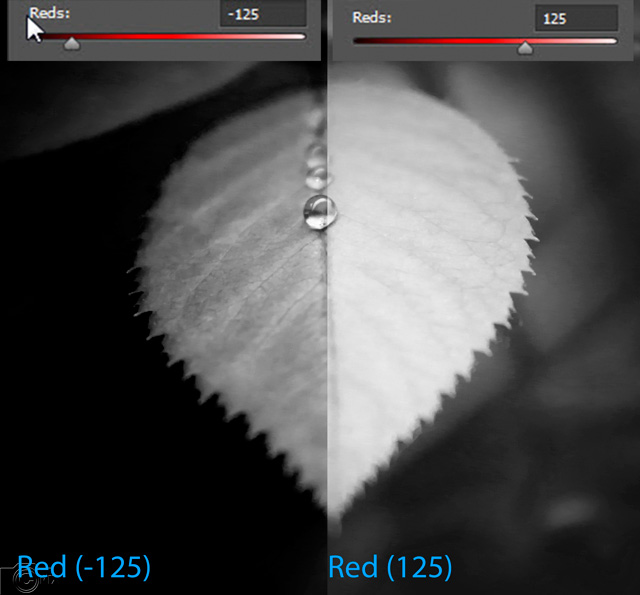
Here I Changed the value of Red channel only, in half I took it towards black and in other half towards white. Therefore because of this red range of color get darker in one half and whiter in another. Tint is another option in black and white to give a sepia type look or some another color tone image.
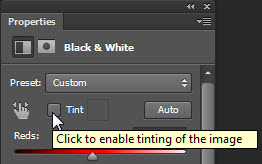

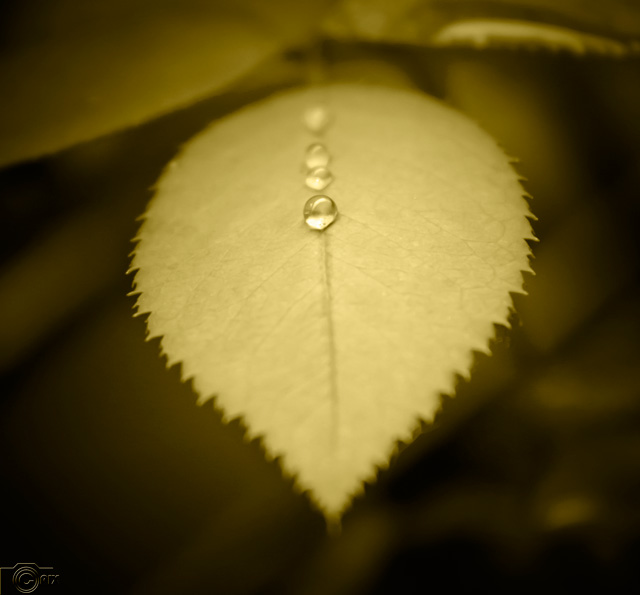
By clicking on this box you can choose color to give overlay on image, I choose this color and below you can see its result.
These are some basic and important color correction methods. You can surely ask us question or suggest something in the comment section given below, Each and every Comment will be Appreciated and Answered! Enjoy!
