Some people make masking a complex topic, but I am telling you it will be most useful and easy topic for you.
Firstly what masking means in Photoshop, in simple words you can understand it by selective transparency.
One important fact of masking is ” Black = 0% and White = 100%”
Now for what I am using 0 and 100, it is for opacity
One important thing, to use masking you wants a special skill of a tool!
Now you are thinking what that big tool is!
That is “brush tool ” ;)
Oh yeah I know you all know about this tool so you well skilled people come let’s start masking.
Firstly let us see basic example to explain, what masking do?
Add Layer Mask
Select your layer and click on “Add layer mask” button.
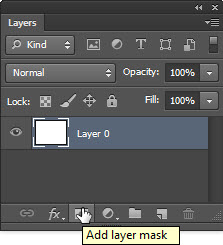
After that you can see layer mask thumbnail on layer, initially it is totally white.
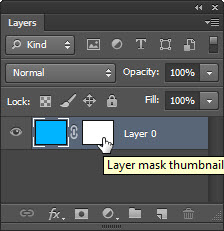
Now after that I click on that thumbnail after that select black color and paint a line on canvas.
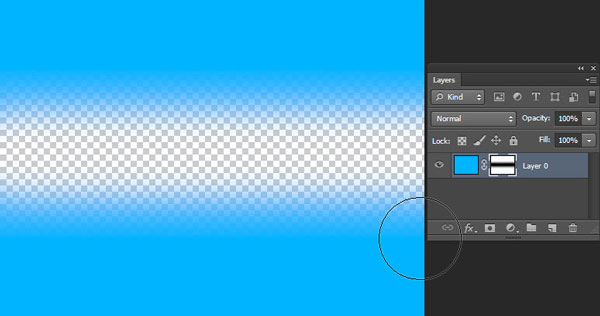
You can see a transparent area “checker area” it means while selecting mask thumbnail, when you paint with black, opacity of that area comes to “0”
You are seeing these checkers as it means transparent, and because there is no layer below the current layer. (to learn more about layers go to Layer Chapter)
Here notice one more thing, that you can see that black line in mask thumbnail as you applied that brush while selecting it.
If somewhere you again want to increase the opacity of that area which you decreased previously, just select mask thumbnail and paint with white color on you canvas.
So it is not just white and black it is about gray scale.
White = 100 and Black = 0 so like that grey colors also have some value it depends on their darkness or lightness.
You can explore creativity with this layer mask.
Now let us see a real world example.
Here I have two images I place them in different layers :
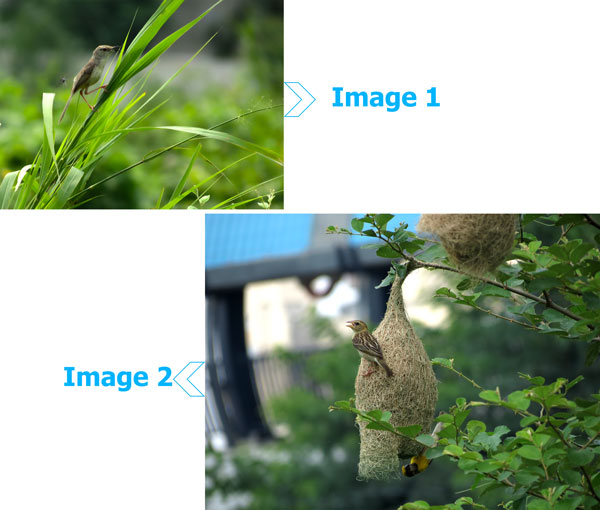
Now I will place image 1 over image 2, to make a new composition.
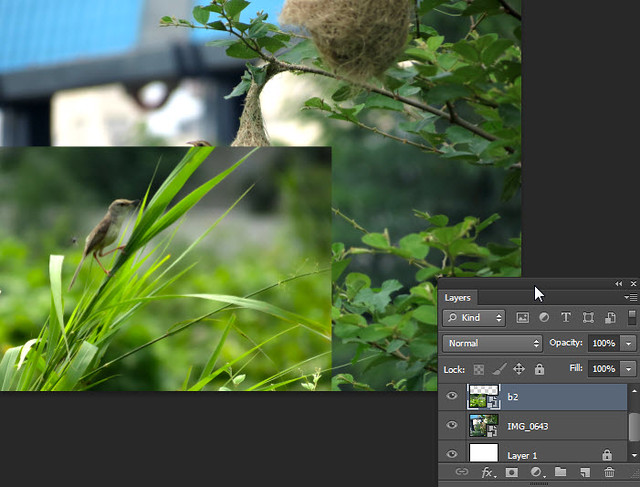
Here we have two images on different layers and image 1 is over image 2
So I want to make a new composition but not like just placing two images, I want to mix them with each other.
So I will put a layer mask on image 1 as I want to control the transparency of that layer only.
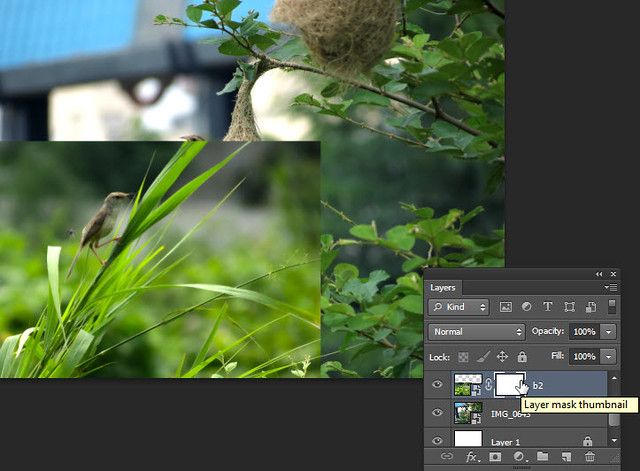
Now I select brush tool with less hardness, so I can give a smooth blend.
Click on layer mask thumbnail and now start painting with black or dark grey color.
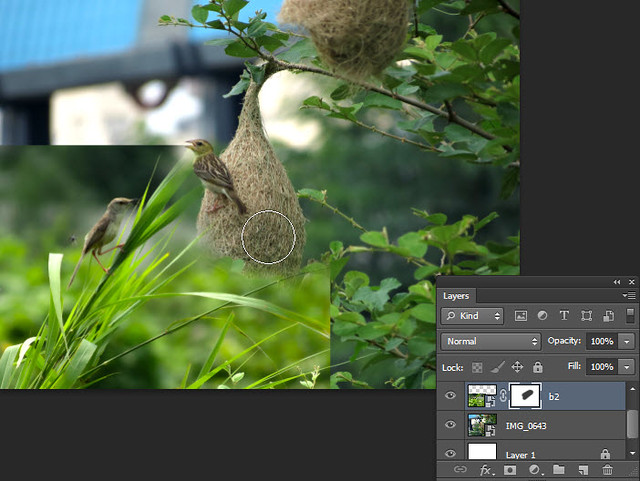
Here you can see opacity of that area is coming down where you apply black color, you can see that black color in mask thumbnail of that layer.
Tip- play with opacity of brush to increase or decrease the strength of brush, by this you can have much control on amount of transparency.
Now I just paint with black on areas where I want transparency and I decrease the opacity of brush to give a feel of blend on edges.

At the end I cropped pick from right to give it better composition and here we have our output with the help of layer mask.
Same with this concept of white and black you can do wonders with your photos, and it will also used in adjustment layers that is explained separately in Adjustment layer tutorial). You can surely ask me question or suggest something in the comment section given below, Each and every Comment will be Appreciated and Answered! Cheers!
