Before gradient let us see solid color, it means a Simple Swatch of color. It doesn’t have flow or depth in it. Like here we have a single solid color Dark Blue. 
In contrast to solid color, by gradient you can understand flow or mixing of one color to other. This technique of coloring is widely used in graphics and web designing.
It creates depth in graphics and gives some lively looks to design.

Now in this we have Gradient of Blue and white. I used flow of blue to white and then again blue. So this is an overview that what gradient means.
Now let us see how gradient tool works.
You can find Gradient Tool in toolbar. Shortcut Key is G (for all shortcuts go to Photoshop Shortcuts)

How to apply gradient in a shape or in a selection?
Before applying gradient in a shape you have to make it Rasterize.(to learn about layers go to Layer Tutorial )
Then Press Ctrl and click on layer thumbnail to make it a selection.
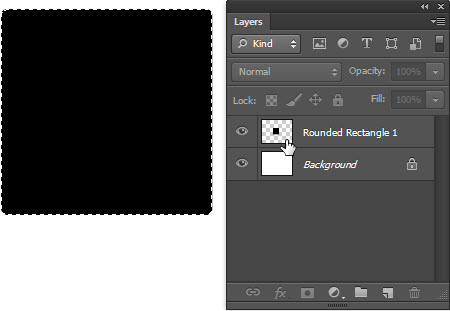
Select Gradient tool drag it from one to another point of selection in any desired angle.
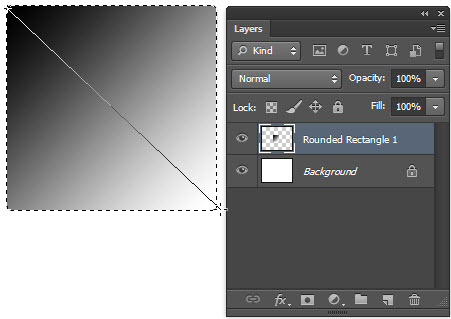
Now this is overview of working of gradient tool.
Let us see its options on option bar which gives you lot of controls.

Firstly we will see Gradient Editor and picker.
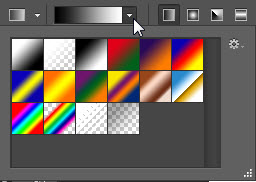
When you click on the arrow a drop down box will appear with presets gradients and which you created by your own.
And when you Click on Gradient editor ( gradient preview area) a window will open in which you can make your own color combinations .
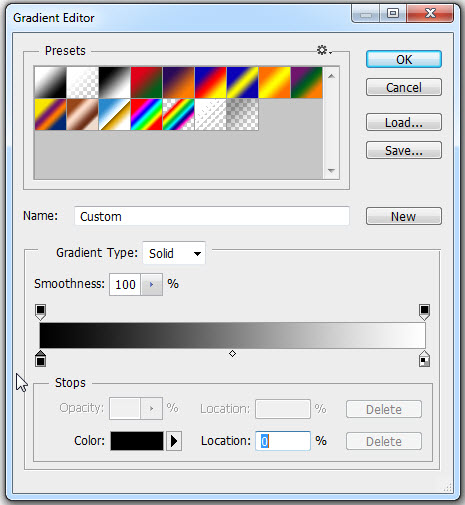
Now firstly see how you will create a gradient?
There are buckets of color which are hanging below gradient bar are known as color stop, you can define particular color in it by click on color option which is present below in window or you can double click on color stop and a color picker window will appear.
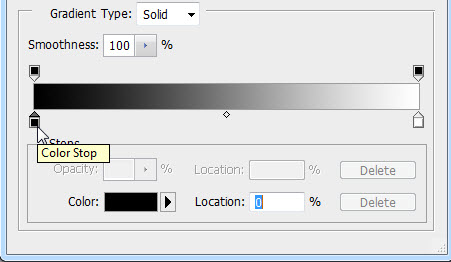
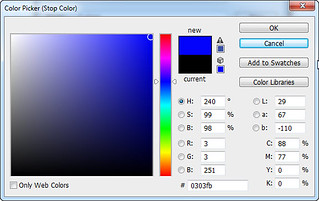
Now if you want to add a new color in the flow of gradient then click below the gradient bar where you want that color.

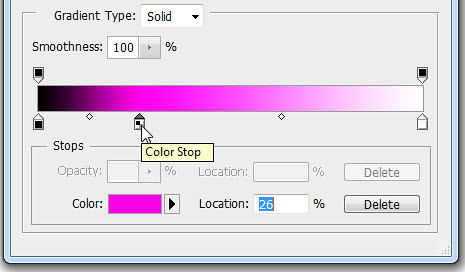
Like here I add a pink color stop in between the gradient flow.
Now if you want to delete a color stop then you have a delete button below in window.
But for an ease you can just drag down the color stop and it will be delete.
So you learn about changing color, adding and deleting color stops, but when you are making a gradient you also need to set proportion or ratio of color. Here you have a midpoint between two color stops from where you can set ratio of two colors.
It will appear when we click on a color stop.

Move it in left or right direction to set the ratio of colors.
Now come to transparency in gradient.
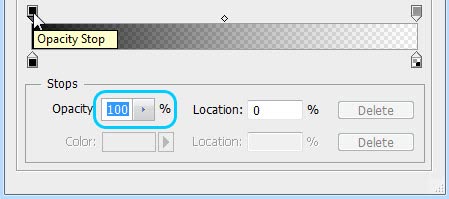
Color bucket on above side of gradient bar is known as opacity stop.
Black = 100% opacity and White = 0%
You can set opacity from opacity box given in Stops Section.
Types of Gradients :
We have five types of brushes which are explained below in this image.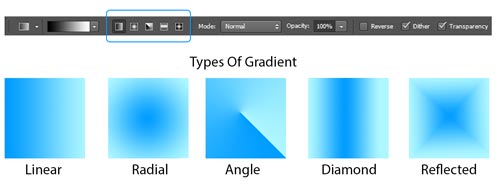
- From opacity on option bar you can adjust transparency for whole gradient.
You can see Mode in option bar, these are blending modes which we explained in Layer Blending tutorial. - Select Reverse to reverse the order of color in gradient flow.
- Dither is for smooth blend of colors.
- In last select transparency if you set some transparency in your gradient.
Here we complete this tutorial, create flow of colors in your creations. Hopefully this tutorial helps you. Ask your Questions related to topic below in comments bar. Share Tool Tutorial with your friends.


