In previous tutorial we learn about basic Type tool and its options and now in this tutorial we will learn it in more depth. Character and Paragraph panels have some advance options to control our Text part in project.
You can activate it in different ways: From windows menu you can activate Character panel by clicking on character.
Another way, with the Type Tool selected, is to click on the small Character and Paragraph panels toggle icon in the Options Bar.![]()
Now here this is Character panel. It contains options like font, font size, leading, tracking, Kerning, Baseline Shift etc. We already discussed about Font , font size and color in tutorial of Type Basics. So we will learn about options found in character panel that’s not available in the Options Bar.
Leading
It controls the amount of space between lines of type. By default, Leading is set to Auto: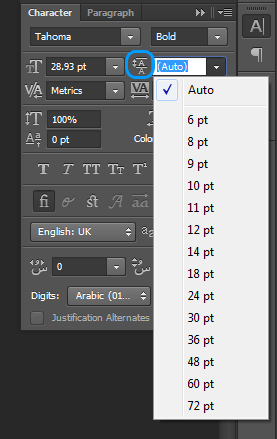
For Example : Here in 1st image leading is AUTO and Then in second I Change it to 72pt, and you can see difference in amount of space b/w two lines in both images.

Here is one more method to change the values of these option, that is Slider. You have to click on the icon and just slide it left and right to increase or decrease the values, this will work same in all options.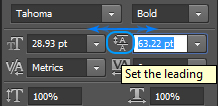
Kerning
It controls the space between two specific letters or characters.
Default it is set to Metrics it means that Photoshop is using the letter spacing information that was included with the font by the font’s designer. Otherwise you can change it according to your need, or to add some creativity.
How it works ?
Firstly place cursor between two letters, now you can adjust value by drop menu presets or slider (as explained above in leading).

Tracking
It controls the amount of space between a range of letters or characters. Now many of us have confusion between tracking and kerning. So they work similarly but main difference is that Tracking works with Range or Group of letters and Kerning works with only two letters.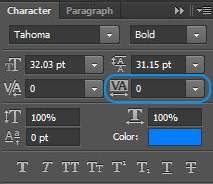
So here is an example to explain its working. Select the range of letters or a word on which to want change. (For basics of Text Selection Go To Basic Type Tutorial)

Now increase the value of tracking, and you can see the increase in space between selected letters.
Vertical And Horizontal Scale
So here is next option or we can say options. You can see these two icons Vertical and Horizontal scale below Tracking and Kerning. As you can understand by these names that vertical scale is used to scale letters vertically and same as this horizontal scale with scale them horizontally.
How it works?
Firstly you have to select a characters or letters which you want to scale.
Change Values of Vertical or Horizontal Scale by sliding the slider left or right respectively for increase or decrease the values.
So now here I did this with Vertical and Horizontal Scale, you can also give some Creative kick to your text with these controllers.
Baseline Shift
It allows us to move selected characters or words above or below the font’s baseline. By default, it’s set to 0 pt. Positive values will shift the selected text above the baseline, while negative values will shift it below the baseline.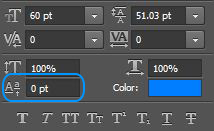
Now have an eye on its working, As we did in every option, just select the characters on which you want effect of this controller.
Now change the values by slider to shift the character upwards or downwards.
Here I did this by shifting baseline of character, use these controllers in a way that you can spread your creativity in best way by text in your projects.
Here are some Extra options in Character Panel. Faux Bold and Faux Italic, which can be used to create fake bold or italic styles when the font you’re using doesn’t include them.
All Caps and Small Caps options for converting lowercase letters into either full size or smaller size uppercase letters.
Superscript and Subscript options, sometime we need this in math or science documents.
In last standard Underline and Strike-through options.
Language
This option is not that we think by its name, it will not translate by selecting language. It’s just for making sure you’re using the correct spelling and hyphenation for whichever language you’re targeting with your Photoshop document. Normally you can leave this option set to its default value.
Reset Character Panel
If you did lot of things here and there, played with every option, and now wanna go back to defaults. So click on this option a menu will drop down select Reset Character and u will go back to defaults.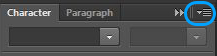

So here we cover the character panel and now in next tutorial we will learn about Paragraph panel.
Hopefully this tutorial helps you. Ask your Questions related to topic below in comments bar.


