Blending images is something like mixing some ingredients to have a final dish with blend of flavors in it. For an example we have some mangoes, dry fruits, milk, ice cream and we blend them with each other to have a tasty Mango shake, oh again these tasty dishes. Forget it, come back to blending options, now like above example we can blend our images or layers to give a new flavor in it. It can be used to enhance your images or if you want to give a new meaning to images.
Regarding layers, blending means how two layers interact with each other or you can say how one layer effect other one. Sometime we feel blending layers as a guess work, like we try every option and then whatever suits us we select that. But we should also know about meaning of that blend option, so that we can achieve our desired output.
Now come to its working and understand types of blending options. To select blending option just select that layer and then from list of layer blend choose the appropriate option to have your desired output.
There are three elements of blending.
1. Base Color – Color in original layer or image.
2. Blend Color – Color applied on upper layer, it may be a image or color by painting tools (Painting tools will be explained in a different session of Painting Tools chapter)
3. Result color – It is the color with we get from the blend of two layers.
Note – Change blending option of blend layer only which will always above base layer.
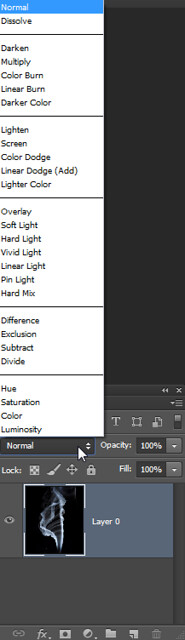
Overview of different blending options are :-
This will be our base layer in explanation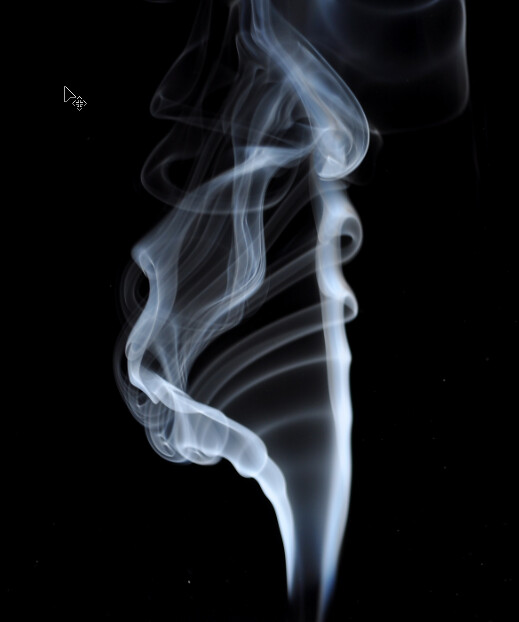
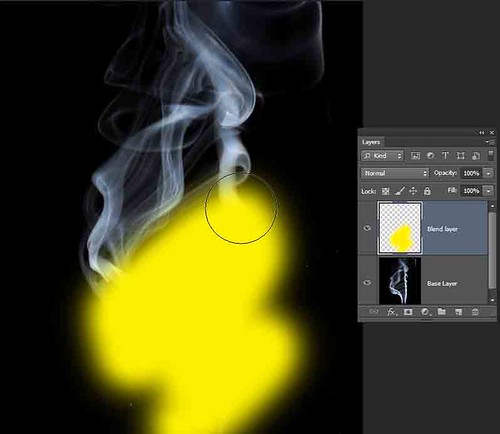
Normal – By default every layer has normal blend. It will show exact color which is applied on blend layer. As I am applying blue color but is not blending with it because we set blend color layer to NORMAL.
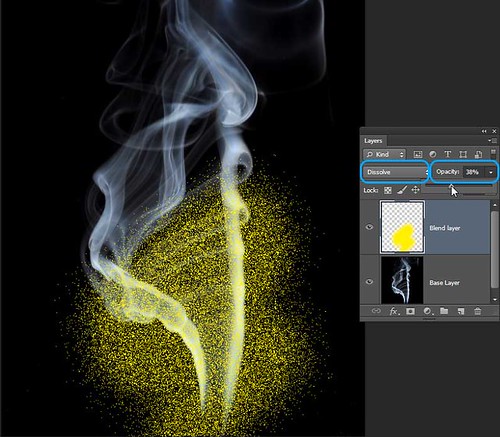
Dissolve – In this we get result color with random replacement of pixels with the base color or the blend color. Replacement of pixels depends on opacity of pixels. Now I reduce the opacity of blend layer to show the effect of dissolve. Result color will be like grainy.
Now other than these two there are FIVE important blending options which we will explain in this tutorial.
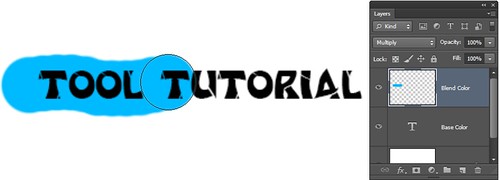
Multiply – Its working is same as its name, it multiplies the base color with the blend color. Result by multiply blend will always a darker color.
If blend color is black then result color will also be black and if it is white then base color is unchanged.
Other than white and black colors it will produce darker color. If you use brush tool (explained in Painting Tools) result will be like magic marker.
I apply blue color as blend color text as base layer with multiply blending option and here is result color, by which you can understand its use.
Screen – Technically it multiplies the inverse of base and blend color. Its result will always be lighter. Screening with white color will produce white and with black color base will be unchanged. It is something like projecting an image on other image.
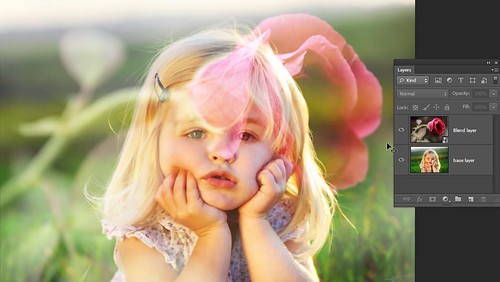
Here we have two images one we use as base and other as blend.
 Now see the end result when we turn blend image to screen mode, it will look like photographic effect, blending of two images.
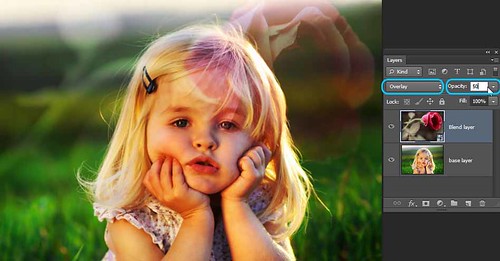
Overlay – It produced contrast output. In this base color will not replaced but is mixed with blend color to show lightness and darkness of original color. It preserves the highlights and shadows of the base color.
I will explain this with two examples
Firstly we will take above images only which we choose in Screen mode, but this time we keep overlay as blending mode.
So result will be this with Overlay, I reduce the opacity of blending layer as it is producing very dark effect.
Second example
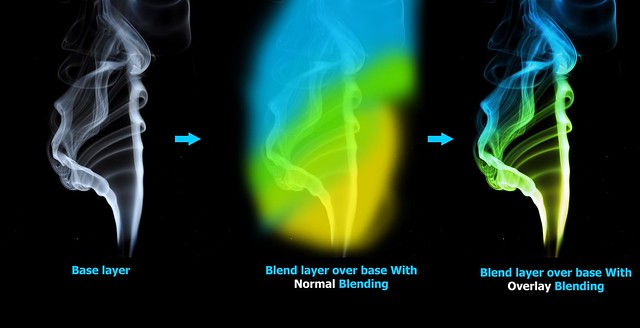
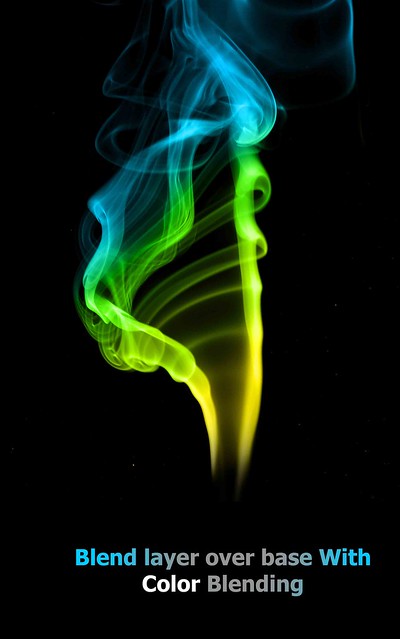
Now I take an image of smoke as a base layer and apply some colors using paint brush as blend color.
Here in this image we can see base layer and then when we apply colors as blend color with normal blend.
After that when I changed blending normal to overlay I got my desired result.
Color – It gives an output with the blend of luminance (brightness) of a base color and Hue and saturation of blend color. It will be useful to color monochrome images.
In this example I use above layers only which I used to explain overlay, but changed blend option to color and now you can see a change it mix hue and saturation of blend with luminance of base and by this example you will understand how it is useful to color monochrome images.
Luminance – This option is last but not the least. You can say it is opposite to color blend. As it blend Hue and saturation of base and luminance of blend layer.
Now I will explain this example with a color correction option.
Here I will take this girl image as base and for blend layer I am choosing an Adjustment layer ( It will be explained in next tutorial)
Now firstly I give an overview, that what I want to do.
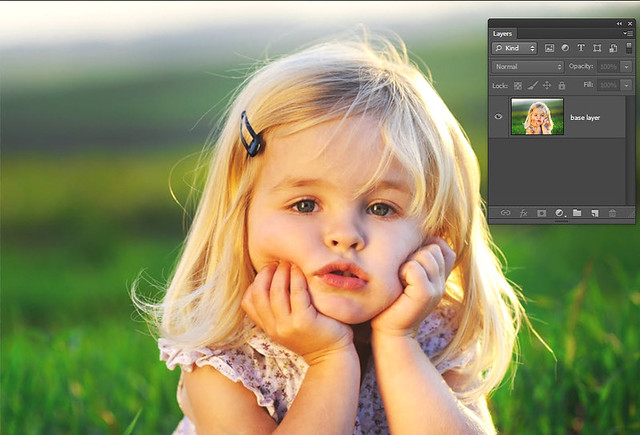
For me this image is little dull and I want to give some contrast to it.
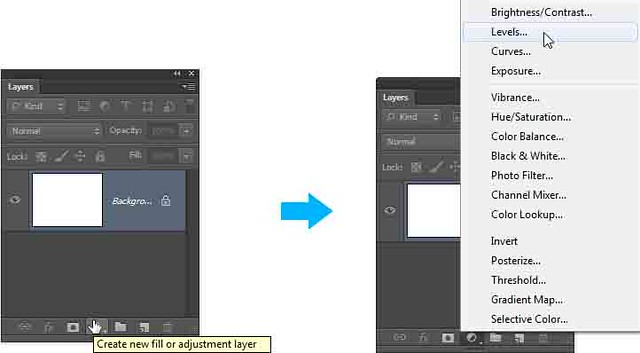
So for that I choose Level Adjustment layer, it is a type of color correction method (Color Correction will be explained in separate Color Correction Chapter)
Now here I create Level Adjustment layer from layer panel.
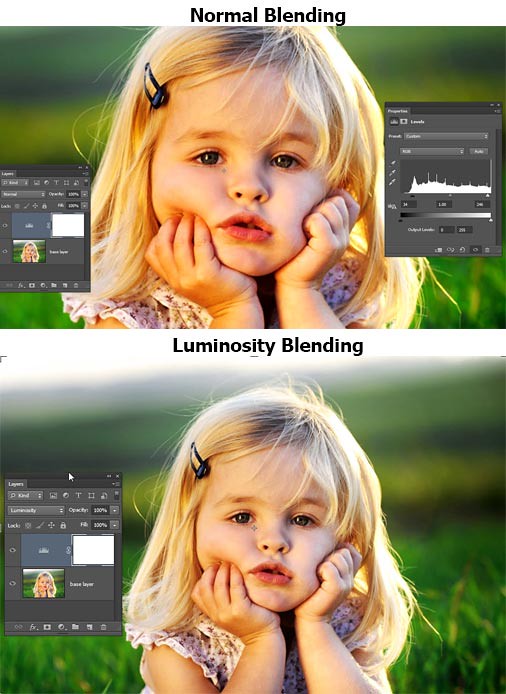
Now I apply changes in level, and we have a contrast image.
But now you can see its changes color due to effect of changes in level.
To exclude the effect of Level on color I change the blend mode of Adjustment layer to Luminosity mode.
So now level has no effect on color.
Press PAGE 2 for briefly explanation!


